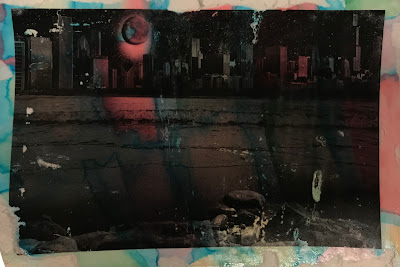
The first step in this printing process was picking out which photo of ours that we wanted to use. We had to crop the pictures to a certain size to fit the paper that we used. Next we had to rip the paper into two parts and use watercolor to color it. I chose bright colors to show through the darker image. We had to wait for the watercolor to dry before we used mod podge on the image and put it face down on the water color. By using the squeegee, we were able to get all the extra mod podge out from under the image. After waiting another day for the mod podge to dry we used water to scratch off all the paper to reveal our final prints. It took multiple times of scratching the paper off before it started to look normal. This entire process was a transfer print where we took the original photo and transferred it onto another surface. One thing I thought I did well was the watercolor designs since it really makes the transfer pop. One thing I wanted to improve on was getting all of the paper off and not making any holes in the print. This was a fun project for us to do since we aren't able to do the advanced printing techniques that we learned earlier.
The first step in this printing process was picking out which photo of ours that we wanted to use. We had to crop the pictures to a certain size to fit the paper that we used. Next we had to rip the paper into two parts and use watercolor to color it. I chose bright colors to show through the darker image. We had to wait for the watercolor to dry before we used mod podge on the image and put it face down on the water color. By using the squeegee, we were able to get all the extra mod podge out from under the image. After waiting another day for the mod podge to dry we used water to scratch off all the paper to reveal our final prints. It took multiple times of scratching the paper off before it started to look normal. This entire process was a transfer print where we took the original photo and transferred it onto another surface. One thing I thought I did well was the watercolor designs since it really makes the transfer pop. One thing I wanted to improve on was getting all of the paper off and not making any holes in the print. This was a fun project for us to do since we aren't able to do the advanced printing techniques that we learned earlier.

Comments
Post a Comment