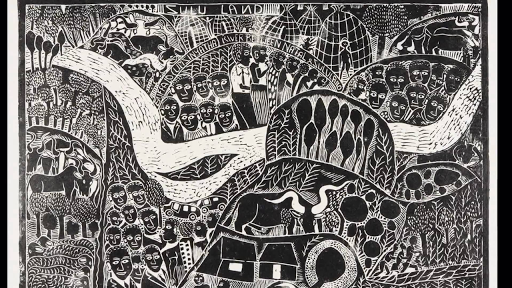
Pressure + Ink: Relief Process
In the Relief Process, the nonprinting part of the block or plate, is either cut or etched away, leaving the design standing. Or, instead of cutting away the background, the relief print can be created by building up the printing surface. The relief is the positive image and represents the printing surface. The most familiar relief-printing materials are wood and linoleum. This is expressed more in areas than lines.
1. Images are drawn directly onto the linoleum block with a pencil.
2. A chisel is used to carve away all of the negative space, removing most of the surface of the linoleum.
3. Ink is applied to the surface of the block with a rubber roller and the ink sticks to the surface of the linoleum.
4. When the block is run through a press, the ink is transferred to a sheet of paper
5. It takes several days for the ink to dry on the drying rack but then it is complete

Pressure + Ink: Intaglio Process
Intaglio printing is the opposite of relief printing, in that the printing is done from ink that is below the surface of the plate. The design is cut, scratched, or etched into the printing surface or plate. Intaglio requires huge amounts of pressure to get the best results. Intaglio processes are probably the most versatile of the printmaking methods since various techniques can produce a wide range of effects. The intaglio gives it a three-dimensional feel.
1) Apply ink to the entire surface of the finished plate by using a roller. The ink is then spread across the plate, forcing the ink into every line and area from the drawing.
2) The plate is then wiped with a rag. This removes the ink from the raised areas of the plate, leaving only the ink in the lower areas to be printed.
3) The plate is then placed onto an etching press. A dampened sheet of etching paper is laid on top. Two blankets are placed on top of the paper.
4) The plate is then cranked between two steel rollers where it grabs the ink. Once it reaches the other end of the press, the blankets are lifted off. The paper is removed to reveal the finished impression.
Pressure + Ink: Lithography Process
Lithography is based on the fact that water and grease do not mix. The image is drawn or painted on the stone or metal plate with greasy crayon or a greasy black ink. Once the drawing is finished, it is fixed with an etch to prevent the spreading of the grease. A mixture of gum arabic and nitric acid, the etch is used to protect the drawing from water and to further the undrawn areas to printing ink. The nitric acid opens the pores of the stone, enabling the gum and the grease to enter easily. With this mixture it accepts ink easily but repels all of the water to make for a good replication of the original drawing.

1) Apply rosin to image to allow the image to be sketched
2) Apply gum arabic to stone
3) Apply acidified gum arabic
4) Remove some etched material and add another layer of gum arabic
5) Buff evenly with a cheesecloth
6) Wash drawing out with lithotine and replace it with asphaltum
7) Buff asphaltum down just like previously
8) With wet and dry towels, go over the surface of the stone
9) Right after the surface has been sponged, apply the ink
10) Print on damp sheet of paper
Out of these types of printing, the one I would want to try the most is Lithography. Although the process is very long, I feel like the end result is worth the effort. I like the fact of drawing on the stone just to give it sort of a rustic and older feel. It is also very detailed so all of the lines and edges that you have drawn will show up on the duplicate. It is cool to see how printing has evolved throughout the years from turning black and white images into color or being able to design anything you want on a computer, it just goes to show how technology is taking over.
Comments
Post a Comment